
EF Core Migrations in SQL Azure
Make sure that the database migrations are run properly against the database
This article describes how to set up a separate database migrations step in an Azure DevOps release pipeline. In order to make sure a SQL Azure database is up to date with the latest schema, this is a method that can be used and applied in an automated release pipeline.
Technologies
- .NET Core 2.x Web Api
- EntityFramework Core
- Azure SQL database
- Transact-SQL
Easiest method first
If you want to get up and running quickly, you can configure migrations to run upon the web app startup. This method is quicker to implement but gives less visibility and control over what is and is not committed against the database. Adding the below snippet to the Startup.cs file will setup the DbContext and run migrations against the database when the app starts up.
Generating a migrations script post build
Let’s assume you have a .NET Core Web Api project called GoodProject.Api and a separate project for your database GoodProject.Data. As GoodProject.Api is a .NET Core project it should have everything it needs to run the post build commands to generate the migrations script. However GoodProject.Data requires two package dependencies to be able to access and create the scripts. Install:
- Microsoft.EntityFrameworkCore.SqlServer and
- Microsoft.EntityFrameworkCore.Tools
Upon deploying your web app to Azure you want to make sure that the database migrations are run to keep your database schema up to date. Here’s a few lines that you can add into your Api .csproj file to generate an idempotent single file sql script to run on your database to update the schema.
This adds an MSBuild event after your project builds which calls the dotnet cli. It is run under the condition that you are creating a Release build. Alternatively you could remove this condition and the script would be generated on Debug builds (for when you are developing locally).
Let’s take a closer look:
dotnet ef migrations scriptCreate a sql script that can apply all of the database migrations.--no-builddon’t build the project again (as it has already been configured to run as a PostBuildEvent).--idempotentcreate the sql file so that the script can be run over and over again resulting in the same outcome.--output $(TargetDir)\migrations.sqloutput the file to my project build directory (usually GoodProject/bin/Release/netcoreapp2.2) and call the file ‘migrations.sql’.
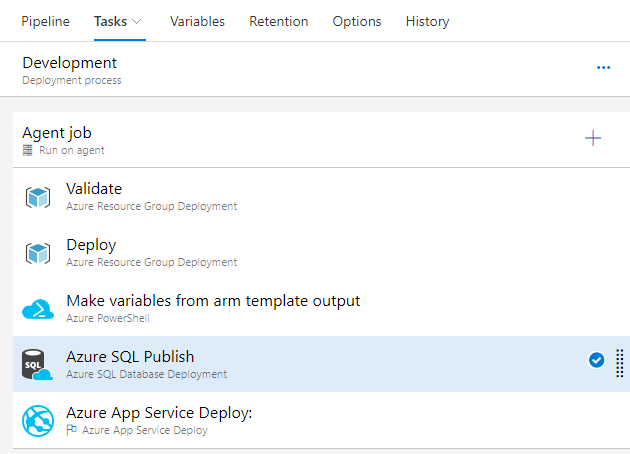
Setting up the migrations step in CI/CD
In the Azure DevOps release pipeline, add a Sql Publish step.
Then set up the publish step to deploy to your database. Access the variables in the release pipeline using the format $(variableName). This allows you to keep credentials secret and change them easily by storing them in one place as opposed to hard coding them into each step of the release pipeline. Variables can also be set depending on which environment you are deploying to. For example $(sqlDatabaseName) can be different for your Development, Staging and Production environments. The step will be configured based upon which environment you are deploying to.
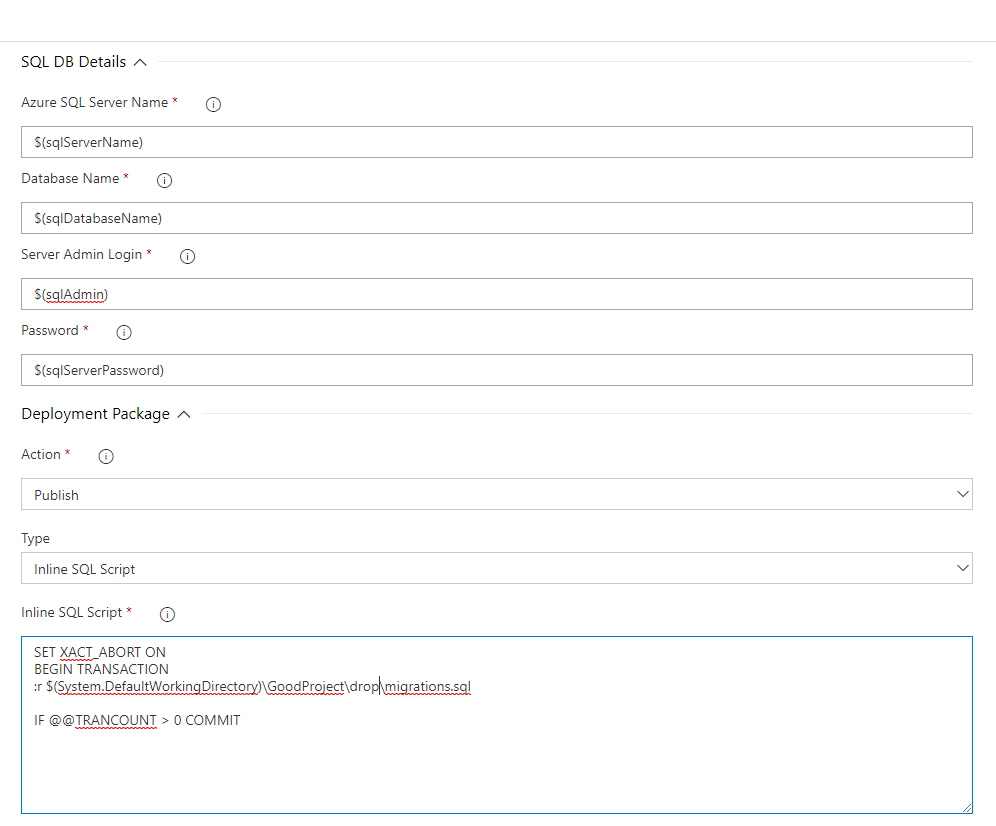
By choosing to execute an Inline SQL Script, we can add some extra settings to the generated migrations.sql file before executing it.
-
SET XACT_ABORT ON is a safeguard to errors. If there is a runtime error in the sql script, it will abort the entire transaction (all migrations) so that nothing is left partially updated. Read more about this here
-
BEGIN TRANSACTION starts a new SQL transaction in which multiple sql statements can be committed or rolled back as one block. This increments the variable @@TRANCOUNT by 1. Read more here
-
:r {path to sql script} Loads the migrations sql script resource.
-
IF @@TRANCOUNT > 0 COMMIT If there are no errors then commit the transaction. This step makes all of the sql statements that were run committed permanently in the database.